
System File Checker — sfc — scans Windows protected system files and replaces damaged or missing ones from a cached copy. It is usually the first repair tool you reach for when Windows starts behaving unexpectedly: random crashes, applications that fail to start, or Windows Update errors that keep returning after every attempt. The command is fast to run, requires no external files, and leaves a detailed log of exactly what it found and what it changed.
What the documentation does not explain clearly is when SFC works and when it hits its own limits — specifically, what to do when it reports corruption it cannot fix. This article covers all SFC options with practical examples, and explains where to go when SFC is not enough. For the next step in that situation, see the DISM repair guide.
Quick answer
Full system scan and repair — the command you will run in most situations:
sfc /scannowRequires an elevated CMD or PowerShell prompt (Run as Administrator).
What SFC does
SFC checks the integrity of Windows protected system files — executables, DLLs, and other components that Windows protects against modification. For each file, it computes a hash and compares it against the expected value stored in the Windows component store at C:\Windows\WinSxS. If a file is damaged, missing, or has been replaced with a modified version, SFC restores it from that store.
This is also SFC’s main limitation: it can only repair files if the component store itself is intact. If the store is corrupted, SFC will detect problems but cannot fix them — because its repair source is damaged. In that case, DISM must repair the store first, and then SFC can complete its work.
| Option | What it does | Repairs? |
|---|---|---|
/scannow | Scans all protected system files, repairs if possible | Yes |
/verifyonly | Scans all protected system files, no repair | No |
/scanfile | Scans and repairs a single specified file | Yes |
/verifyfile | Checks integrity of a single specified file, no repair | No |
/offbootdir + /offwindir | Offline scan/repair targeting a Windows installation on another drive | Yes |
C:\Windows\Logs\CBS\CBS.log after every run. The terminal output only shows a summary — the log contains the full list of files checked, any corruption found, and whether each repair succeeded. See the CBS.log guide for how to read it.
Practical examples
1. Run a full system scan and repair
The problem: Windows is behaving unexpectedly — an application crashes on launch, a system component throws errors, or Windows Update keeps failing with the same error code. You need to check whether corrupted system files are the cause.
The solution: /scannow checks all protected system files and replaces any it finds damaged. This is the default starting point for most system file integrity issues.
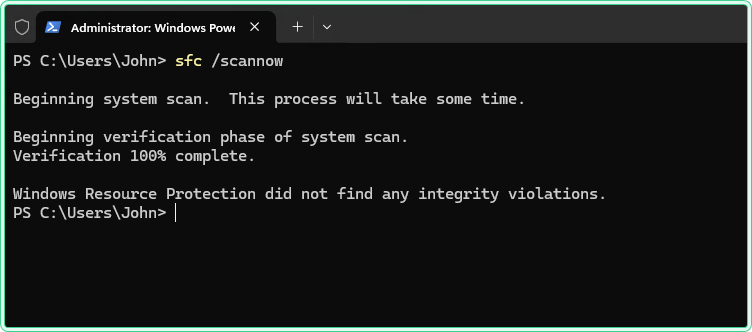
sfc /scannowThe scan typically takes 5–15 minutes. Do not close the window while it runs. When complete, you will see one of three results:
Windows Resource Protection did not find any integrity violations.
Windows Resource Protection found corrupt files and successfully repaired them.
Details: CBS.log windir\Logs\CBS\CBS.log
Windows Resource Protection found corrupt files but was unable to fix some of them.
Details: CBS.log windir\Logs\CBS\CBS.log
The third result means the component store itself is damaged. SFC cannot repair files when its own repair source is corrupted. The correct next step is to run DISM to restore the component store, then run SFC again:
DISM /Online /Cleanup-Image /RestoreHealth
sfc /scannow
For the full DISM repair workflow including the offline path, see the DISM repair guide.
2. Check for corruption without repairing anything
The problem: You want to know whether system files are intact before performing a manual repair or before handing a machine off. You do not want SFC to automatically replace files — you need to assess the situation first.
The solution: /verifyonly runs the same scan as /scannow but does not attempt any repairs. It reports what it finds and stops there.
sfc /verifyonlyThe output format is identical to /scannow, but any corruption found is only logged — not fixed. This is useful when you need a damage assessment before deciding on a repair strategy, or when you are documenting the state of a machine before escalating.
3. Scan and repair a single file
The problem: A specific application or Windows component is failing, and you have reason to suspect a particular system file — perhaps a DLL it depends on is throwing errors in the application event log. Running a full /scannow takes 10+ minutes; you want to check just that one file.
The solution: /scanfile checks and repairs a single file specified by its full path. Much faster than a full scan when you already know which file to target.
sfc /scanfile=C:\Windows\System32\kernel32.dll4. Verify a single file without repairing it
The problem: You want to check whether a specific system file has been modified or is corrupt — without triggering an automatic replacement. This is useful when investigating a potential tampering scenario or confirming a file’s integrity before a planned manual replacement.
The solution: /verifyfile checks the integrity of a single file and reports the result without making any changes.
sfc /verifyfile=C:\Windows\System32\kernel32.dllExpected output when the file is intact:
Beginning verification phase of system scan.
Verification 100% complete.
Windows Resource Protection did not find any integrity violations.
5. Scan and repair a Windows installation on another drive
The problem: A machine will not boot — Windows is too damaged to start normally. You have booted into a recovery environment (WinPE or Windows Recovery) and need to run SFC against the offline Windows installation on the damaged drive.
The solution: Use /offbootdir and /offwindir to point SFC at the offline installation. Assume the damaged Windows drive is mounted as D: in the recovery environment:
sfc /scannow /offbootdir=D:\ /offwindir=D:\WindowsTo also save the scan log to a specific location (useful when the recovery environment has limited write access):
sfc /scannow /offbootdir=D:\ /offwindir=D:\Windows /offlogfile=C:\sfc-offline.txtdiskpart or dir D:\Windows to verify you are pointing at the right drive.
/Image instead of /Online. If SFC offline repair does not resolve the issue, the DISM offline path is the logical next step. See the DISM repair guide for details.
Hidden gems
SFC can run while Windows is running — but not always repair while it does
SFC can scan and repair most files while Windows is running. However, some core files are locked by the OS and cannot be replaced in a live session. When SFC encounters one of these, it schedules the replacement for the next boot — Windows swaps the file during early startup before it is loaded. This is why Microsoft sometimes recommends running SFC twice: once to identify and schedule repairs, and again after reboot to confirm they completed. The CBS.log will show “queued” entries for files that were scheduled rather than immediately replaced.
The terminal output is not the full story
The summary message you see on screen (“found corrupt files and successfully repaired them”) tells you very little. CBS.log contains the actual list of every file SFC checked, what hash it expected, what it found, and whether the repair succeeded or was queued. If you are troubleshooting a recurring issue, reading the log is not optional. See the CBS.log guide for how to extract just the relevant entries quickly.
Running SFC from PowerShell captures output properly
When you run sfc /scannow from PowerShell and try to capture the output to a variable, you get garbled text — SFC outputs Unicode that PowerShell does not handle cleanly by default. The workaround is to use cmd /c:
# Run SFC from PowerShell and capture output cleanly
$result = cmd /c "sfc /scannow"
$result
“Unable to fix” does not mean the repair failed permanently
The message “Windows Resource Protection found corrupt files but was unable to fix some of them” is often misread as a dead end. It is not — it means the component store that SFC pulls repair files from is itself damaged. Run DISM /Online /Cleanup-Image /RestoreHealth to repair the store, then run sfc /scannow again. In most cases, the second SFC run succeeds after DISM completes.
SFC from PowerShell
SFC is a CMD tool but runs identically from an elevated PowerShell prompt. There is no PowerShell-native equivalent cmdlet for SFC — use the command directly:
# All SFC options work identically from PowerShell
sfc /scannow
sfc /verifyonly
sfc /verifyfile=C:\Windows\System32\ntdll.dllWhere this matters
Windows Update keeps failing — many Windows Update error codes (0x80070002, 0x8007371b, 0x800f0900) are caused by corrupted system files or a damaged component store. Running SFC before re-attempting the update resolves a significant portion of these without further investigation.
Application crashes after a Windows update — feature updates occasionally leave system files in a damaged state. SFC is the standard first check when something that worked before an update stops working afterward.
Post-malware cleanup — after removing malware, SFC confirms that system files have not been replaced or tampered with. Use /verifyonly first for assessment, then /scannow to restore anything that was modified.
Non-booting system in recovery environment — the offline options (/offbootdir, /offwindir) make SFC usable from WinPE when the target Windows installation cannot start, covering recovery scenarios that the online mode cannot reach.
Pre-upgrade health check — running sfc /verifyonly before a major Windows feature update confirms the system is in a clean state, reducing the chance of the upgrade failing partway through due to pre-existing file corruption.
Tips and limitations
- Always run as Administrator. SFC requires elevation. Running it from a non-elevated prompt produces an error immediately — “You must be an administrator running a console session in order to use the sfc utility.”
- SFC only covers Windows protected files. It does not check application files, driver files outside the protected set, or user data. If a third-party application is crashing, SFC is unlikely to help unless the issue is in a shared Windows DLL the application depends on.
- Do not run multiple SFC instances simultaneously. Windows will block a second SFC instance if one is already running and display “Windows Resource Protection could not start the repair service.” Wait for the first scan to complete.
- CBS.log grows over time. Every SFC run appends to CBS.log. On machines where SFC has been run many times, the log can become several hundred megabytes. When reading it, filter for the most recent session using the timestamp at the start of each run’s entries rather than reading the whole file.
- SFC cannot fix a corrupted component store. This is the most important limitation to understand. If the repair source is damaged, no amount of SFC runs will fix the problem. Run DISM first, then SFC.
Official documentation
Related tools
- Windows Event Log Analyzer — paste CBS.log output to get an AI-powered summary of what SFC found and what needs attention
Related guides
- DISM in Windows: repair the Windows image when SFC can’t — when SFC reports “unable to fix some files,” DISM is the correct next step to restore the component store
- How to read CBS.log in Windows — find the specific files SFC checked, what corruption it detected, and whether repairs succeeded or were queued for next boot
- wevtutil command in Windows — export and query Windows Event Logs from CMD, useful alongside CBS.log analysis after an SFC repair
- How to read and clear Windows Event Logs with PowerShell — use Get-WinEvent to find application and system errors that SFC may have been triggered to investigate