
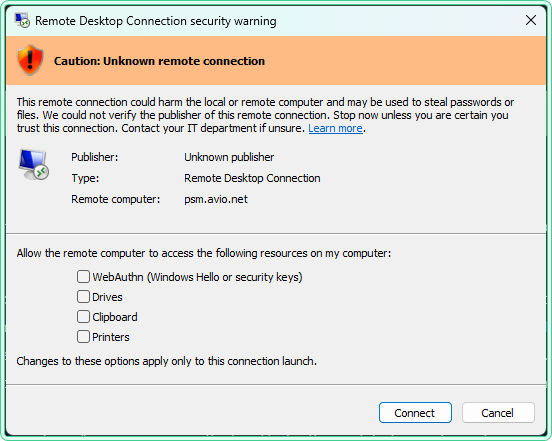
After installing the April 2026 Windows security update, users started seeing a new dialog every time they open an .rdp file — a warning titled Caution: Unknown remote connection with checkboxes for drives, clipboard, and other local resources. Nothing broke. The connection still works. But the dialog is new, unexpected, and blocks the connection until you manually click through it.
This article explains what changed, why Microsoft introduced this warning, how to respond to it safely, and how to temporarily revert to the old behavior using a registry key — with commands for CMD, PowerShell, and a .reg file.
What changed and which update introduced it
The new behavior was introduced by the April 2026 cumulative security update. The relevant KB numbers depending on your Windows version:
| Windows version | KB article |
|---|---|
| Windows 11 24H2 | KB5055523 |
| Windows 11 23H2 / 22H2 | KB5055528 |
| Windows 10 | KB5055518 [Expired] |
| Windows Server 2025 / 2022 / 2019 | Applies — see Microsoft documentation |
The feature is documented by Microsoft in: Understanding security warnings when opening Remote Desktop (RDP) files.
Before this update, opening an .rdp file showed a simple “Do you trust this connection?” dialog. Starting with the April 2026 update, the Remote Desktop Connection app shows two new dialogs:
- First-launch dialog — appears once per user account after the update is installed. Explains what RDP files are and warns about phishing risks. After you dismiss it, it does not appear again.
- Connection security dialog — appears every time you open an
.rdpfile. Shows the remote computer address and checkboxes for each local resource the file requests access to. All resources are unchecked by default.
Why Microsoft introduced this
RDP files have been used in phishing attacks. An attacker sends a crafted .rdp file by email. When the victim opens it, their machine silently connects to a server controlled by the attacker and shares local resources — drives, clipboard, credentials — without the user realizing what is being exposed.
The new dialog forces the user to explicitly see what is being shared before the connection is made. All redirections are off by default. The user must actively enable each one.
.rdp file. If you type a computer name directly into the Remote Desktop Connection app, the experience is unchanged. Connections via Azure Virtual Desktop and Windows 365 are typically signed by Microsoft and should not trigger the new warning.
How to respond to the dialog safely
The dialog shows two pieces of information you should check before clicking Connect:
| What to check | What it means |
|---|---|
| Remote computer address | Verify it matches the server you intend to connect to. If you do not recognize it — cancel. |
| Publisher | “Unknown publisher” means the RDP file is not digitally signed. Treat it with more caution, especially if received by email. |
| Redirections (checkboxes) | Enable only what you actually need. Leave drives and clipboard unchecked unless the session requires them. |
For internal corporate RDP files showing “Unknown publisher” — this means your organization’s RDP files are not digitally signed. Your IT department can sign them so the publisher name appears instead of “Unknown publisher,” which removes the orange warning banner.
How to temporarily revert to the old dialog
If the new dialog is causing disruption in your environment — for example, breaking automated RDP workflows or affecting users who connect to internal servers dozens of times a day — Microsoft provides a registry key to revert to the previous dialog behavior.
The registry key to set:
| Property | Value |
|---|---|
| Path | HKLM\Software\Policies\Microsoft\Windows NT\Terminal Services\Client |
| Name | RedirectionWarningDialogVersion |
| Type | REG_DWORD |
| Data | 1 |
Option 1 — CMD (elevated)
rem Create the registry key to revert RDP warning dialog to pre-April-2026 behavior
rem Must be run from an elevated Command Prompt (Run as administrator)

reg add "HKLM\Software\Policies\Microsoft\Windows NT\Terminal Services\Client" ^
    /v RedirectionWarningDialogVersion ^
    /t REG_DWORD ^
    /d 1 ^
    /f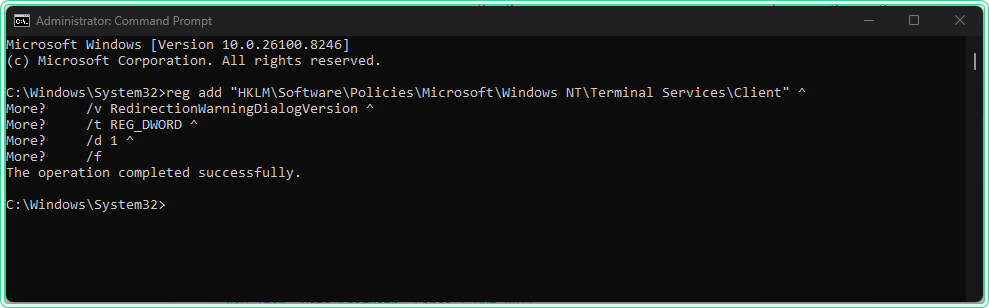
Option 2 — PowerShell (elevated)
# Create the registry path if it does not exist, then set the value
# Must be run from an elevated PowerShell session (Run as administrator)

$regPath = "HKLM:\Software\Policies\Microsoft\Windows NT\Terminal Services\Client"

# Create the key if missing
if (-not (Test-Path $regPath)) {
    New-Item -Path $regPath -Force | Out-Null
}

# Set the value to revert to old dialog behavior
New-ItemProperty -Path $regPath `
    -Name "RedirectionWarningDialogVersion" `
    -Value 1 `
    -PropertyType DWORD `
    -Force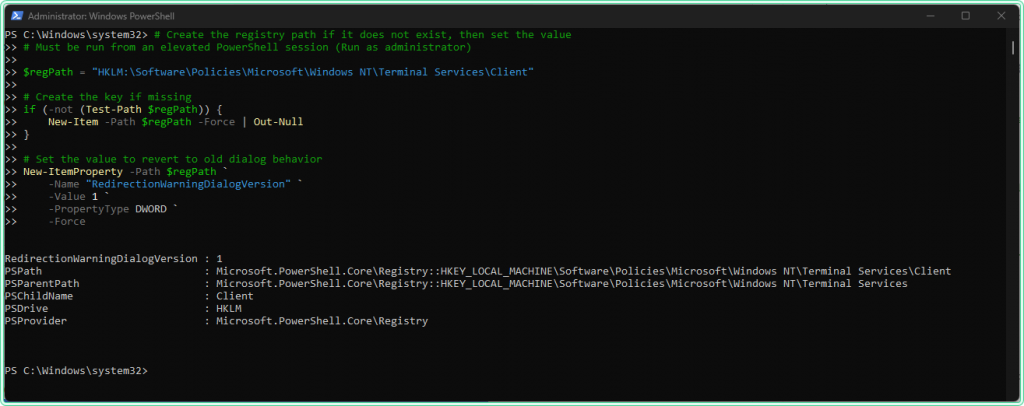
Option 3 — .reg file
Save the content below as rdp-revert-warning.reg. Do not double-click it as you will see the following error message:
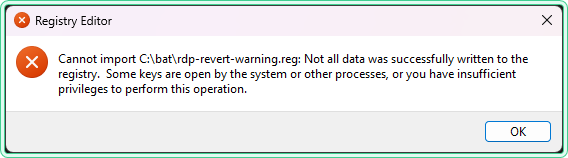
The file writes to HKLM\Software\Policies\, which is protected and will fail silently without elevation. Import it from an elevated CMD instead:
rem Import the .reg file from an elevated Command Prompt
rem Double-clicking will not work — the Policies path requires explicit elevation
reg import "C:\bat\rdp-revert-warning.reg".reg file does not trigger UAC elevation for the HKLM\Software\Policies\ path on all systems. The import will fail with “Not all data was successfully written to the registry” without any visible error prompt. Always use reg import from an elevated CMD.
Contents of rdp-revert-warning.reg:
Windows Registry Editor Version 5.00

[HKEY_LOCAL_MACHINE\Software\Policies\Microsoft\Windows NT\Terminal Services\Client]
"RedirectionWarningDialogVersion"=dword:00000001.reg file is useful for deploying across multiple machines via a startup script or IT provisioning tool — in those contexts it runs with the required system-level privileges automatically.
To verify the key was applied correctly, open Registry Editor and navigate to the path — or run this check in PowerShell:
# Verify the registry value was created correctly
Get-ItemProperty -Path "HKLM:\Software\Policies\Microsoft\Windows NT\Terminal Services\Client" `
    -Name "RedirectionWarningDialogVersion" -ErrorAction SilentlyContinue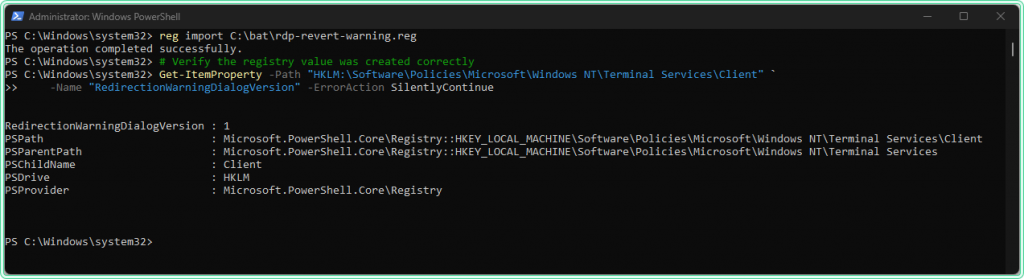
After applying the key, open an .rdp file to confirm the old dialog appears instead of the new warning.
How to undo the revert
To remove the registry key and restore the new security dialog:
CMD
rem Remove the revert key — restores the new April 2026 security dialog
reg delete "HKLM\Software\Policies\Microsoft\Windows NT\Terminal Services\Client" ^
    /v RedirectionWarningDialogVersion ^
    /f
PowerShell
# Remove the revert key — restores the new security dialog
Remove-ItemProperty -Path "HKLM:\Software\Policies\Microsoft\Windows NT\Terminal Services\Client" `
    -Name "RedirectionWarningDialogVersion" `
    -ErrorAction SilentlyContinue
Deployment via Group Policy
If you need to apply the revert key across multiple machines in a domain environment, the cleanest approach is Group Policy Preferences — Registry. This avoids manually running commands on each machine and integrates with your existing GPO workflow.
- Open Group Policy Management and create or edit a GPO linked to the target OU.
- Navigate to Computer Configuration → Preferences → Windows Settings → Registry.
- Create a new Registry item with the path, name, type, and value from the table above.
- Set Action to Update — this creates the key if missing and updates it if present.
To verify Group Policy was applied on a machine, use gpresult /r to confirm the GPO was processed,
or check the registry key directly using the PowerShell command above.
HKLM\Software\Policies\ take precedence over manually set registry values and are reapplied at each Group Policy refresh cycle. This makes GPP the most reliable deployment method for domain environments.
How to check if the revert is needed: read the Event Log
If you apply registry changes and something does not behave as expected, the Event Log is where Windows writes the details. If the new RDP dialog causes failures in automated scripts or RDP clients, errors are reported in the Event Viewer within 15 minutes.
To query relevant events quickly with PowerShell:
# Verify the revert registry key is present and set correctly
# Returns value 1 if applied — empty output means the key is not present
Get-ItemProperty `
    -Path "HKLM:\Software\Policies\Microsoft\Windows NT\Terminal Services\Client" `
    -Name "RedirectionWarningDialogVersion" `
    -ErrorAction SilentlyContinue |
    Select-Object RedirectionWarningDialogVersion
For a broader look at Event Log analysis, see the Get-WinEvent PowerShell guide and the wevtutil command guide. The site also has an Event Log Analyzer tool for parsing and interpreting event output.
FAQ
Does this affect all RDP connections or only .rdp files?
Only connections started by opening an .rdp file. If you type a computer name directly into the Remote Desktop Connection app (mstsc.exe), nothing changes.
Will the registry revert key stop working in the future?
Yes — Microsoft has explicitly stated that a future update may remove support for RedirectionWarningDialogVersion. Treat it as a bridge, not a permanent fix. The long-term solution is to digitally sign your organization’s RDP files.
Our RDP files show “Unknown publisher” but they are internal. Is that a problem?
Not a security problem for users who know the connection is legitimate, but it does mean the files are unsigned. Unsigned files show the orange “Caution” banner regardless of content. Your IT department can sign the files using a code-signing certificate, which causes the publisher name to appear and removes the orange banner.
Does this affect Azure Virtual Desktop or Windows 365?
RDP files from Microsoft services like Azure Virtual Desktop and Windows 365 are typically signed by Microsoft. You should not see the new security dialog when connecting to these services via their official clients. If you do, contact your IT department.
The registry key is set but the dialog still appears. Why?
Two common causes: the session was not restarted after setting the key (sign out and sign back in, or restart), or the key was written to the wrong path. Verify the exact path using the PowerShell check command above. Also confirm you set the key under HKLM, not HKCU — the policy path requires HKLM.
Official documentation
- Understanding security warnings when opening Remote Desktop (RDP) files — Microsoft Learn
- April 8, 2025—KB5055523 (OS Build 26100.3775)
Related tools
- Windows 11 Registry Tweak Generator — generate and validate registry commands for common Windows configuration changes
- Event Log Analyzer — parse and interpret Windows Event Log output to identify errors related to RDP or policy application
- Port Checker — verify that RDP port 3389 is reachable on the target server before troubleshooting the connection dialog
Related guides
- Restore the old context menu in Windows 11 — same pattern: registry revert after a Windows UI change
- Fix trust relationship between workstation and domain — another common RDP failure: machine account authentication breaks before the connection reaches the dialog
- gpresult command in Windows — verify Group Policy was applied correctly after deploying the registry key via GPO
- Get-WinEvent: PowerShell Event Log guide — query Event Log for RDP and policy-related errors after applying the registry change
- wevtutil command in Windows — CMD alternative for querying Event Log when PowerShell is not available