
Network scanning on Windows usually means installing something or switching to Linux. nmap breaks that assumption — it runs natively on Windows, installs in two minutes, and gives you the same scanning capabilities available on any Linux box. For a sysadmin who needs to audit open ports across a subnet, verify firewall rules after a change, or identify what is listening on a machine before deploying a service, it is the most practical tool available.
This article covers installation, the scanning patterns that come up in real admin work, and the output fields that actually matter — without turning into an nmap manual. The focus is on what you run on Windows in a real environment, not on every flag in the documentation.
Quick answer
Scan the most common ports on a single host:
nmap 192.168.1.50Scan a specific port on a host and show service version:
nmap -sV -p 443 192.168.1.50Installation
nmap provides an official Windows installer — no compilation, no dependencies, no PATH configuration required. The installer adds nmap to the system PATH automatically.
- Download the latest stable Windows installer from the official site: nmap.org/download#windows
- Run the installer as Administrator and follow the default options
- Open a new CMD or PowerShell window after installation (existing windows do not pick up the updated PATH)
- Verify the installation:
nmap --version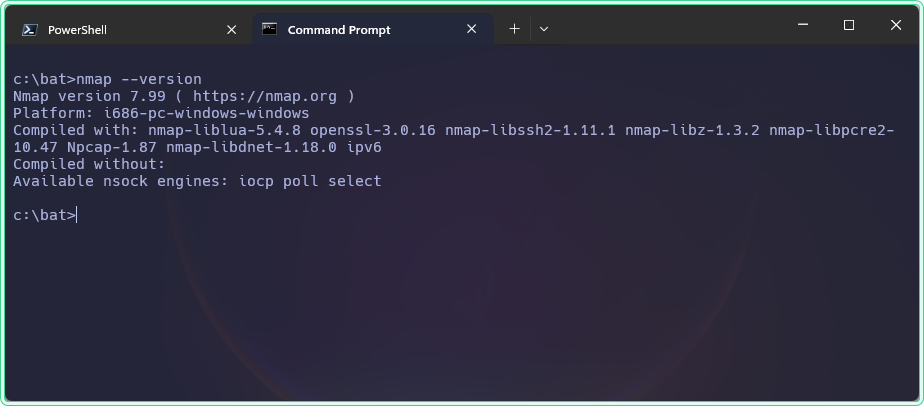
Understanding nmap output
Before the examples, it helps to know what nmap’s port states actually mean — because “closed” and “filtered” are not the same thing, and confusing them leads to wrong conclusions:
| State | Meaning |
|---|---|
open | A service is actively listening on this port |
closed | The port is reachable but no service is listening |
filtered | A firewall is blocking the probe — nmap cannot determine if it is open or closed |
open|filtered | nmap cannot distinguish between open and filtered (common with UDP) |
filtered is the most useful state for firewall troubleshooting — it means the port exists on the machine but a firewall is silently dropping probes before they reach the service.
Practical examples
1. Scan the most common ports on a single host
The problem: You need a quick overview of what is listening on a machine — before deploying a new service to check for port conflicts, or after an incident to confirm what was exposed. You want results in seconds without specifying every port manually.
The solution: Running nmap against a host with no additional flags scans the 1000 most commonly used ports and shows which are open, closed, or filtered. This is the fastest way to get a useful overview.
rem Scan the 1000 most common ports on a single host
rem Run from an elevated CMD prompt for SYN scan (faster and more accurate)
nmap 192.168.1.50
Example output:
Starting Nmap 7.95 ( https://nmap.org )
Nmap scan report for SRV-WEB-01 (192.168.1.50)
Host is up (0.0023s latency).
Not shown: 994 closed tcp ports (reset)
PORT     STATE SERVICE
80/tcp   open  http
443/tcp  open  https
3389/tcp open  ms-wbt-server
8080/tcp open  http-proxy
8443/tcp open  https-alt

Nmap done: 1 IP address (1 host up) scanned in 1.42 seconds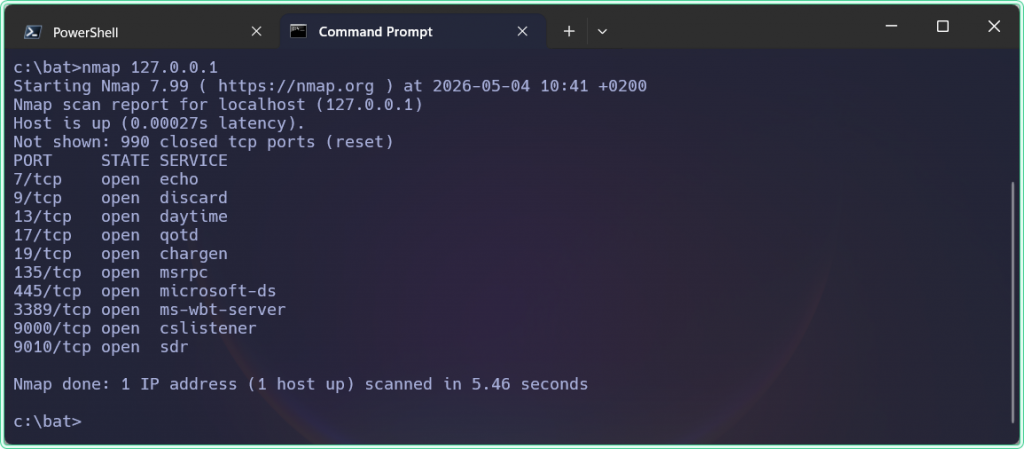
2. Scan a specific port or port range
The problem: After a firewall rule change, you need to confirm that specific ports are now open or closed as intended — not scan everything, just the ports that were changed.
The solution: Use -p to specify exact ports or ranges. This is faster than a full scan and produces cleaner output when you know exactly what to check.
rem Scan a single port
nmap -p 3389 192.168.1.50

rem Scan multiple specific ports
nmap -p 80,443,8080,8443 192.168.1.50

rem Scan a port range
nmap -p 8000-9000 192.168.1.50

rem Scan all 65535 ports — slower but complete
nmap -p- 192.168.1.50
3. Detect service versions on open ports
The problem: A port is open but you do not know what service is actually behind it — whether port 8080 is IIS, Apache, Tomcat, or something else entirely. Or you need to confirm which version of a service is running without logging into the machine.
The solution: The -sV flag tells nmap to probe each open port and attempt to identify the service and version from the response banner.
rem Probe open ports for service name and version
rem -sV = service version detection
nmap -sV -p 80,443,3389 192.168.1.50
Example output:
PORT     STATE SERVICE       VERSION
80/tcp   open  http          Microsoft IIS httpd 10.0
443/tcp  open  ssl/http      Microsoft IIS httpd 10.0
3389/tcp open ms-wbt-server Microsoft Terminal Services-sV actively probes each open port by sending service-specific requests to identify the application. On some services this can trigger alerts in IDS/IPS systems or appear in application logs. Use it deliberately in production environments, not as a default flag for every scan.
4. Scan a subnet to find live hosts
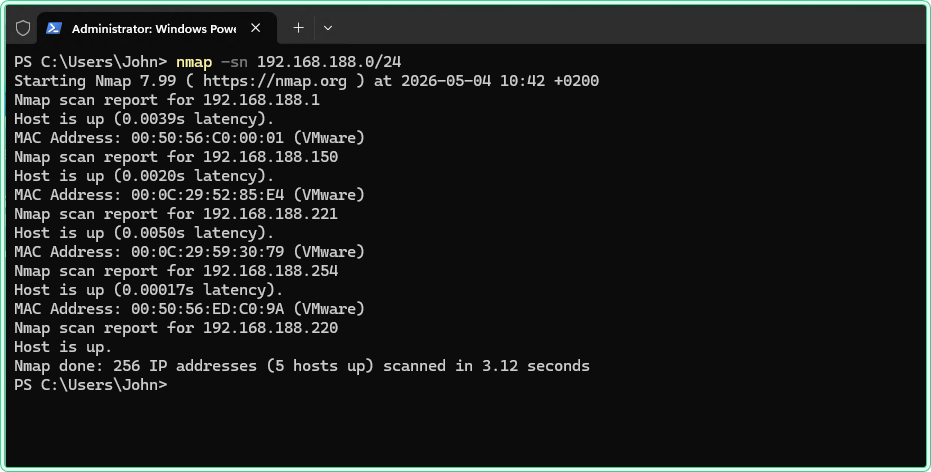
The problem: You need to identify which machines are active on a subnet — after adding new servers, during an audit, or to find a device whose IP you do not know but whose hostname resolves. Manually pinging every address is not practical.
The solution: nmap accepts CIDR notation for subnet scanning. The -sn flag does a ping sweep only — no port scanning — which is fast and produces a clean list of live hosts.
rem Ping sweep — find live hosts on a subnet without port scanning
rem -sn = skip port scan, host discovery only
nmap -sn 192.168.1.0/24
Example output:
Nmap scan report for 192.168.1.1
Host is up (0.0011s latency).
Nmap scan report for SRV-DC-01 (192.168.1.10)
Host is up (0.0018s latency).
Nmap scan report for SRV-WEB-01 (192.168.1.50)
Host is up (0.0021s latency).
Nmap scan report for WRK-FIN-042 (192.168.1.105)
Host is up (0.0034s latency).
Nmap done: 256 IP addresses (4 hosts up) scanned in 3.21 seconds
To scan specific ports across the entire subnet — for example, to find all machines with RDP exposed:
rem Find all machines in the subnet with port 3389 (RDP) open
nmap -p 3389 --open 192.168.1.0/24--open filters the output to show only hosts where the scanned port is open, which makes subnet scans much easier to read when most hosts do not have the port open.
5. Save scan results to a file
The problem: You need to document the open ports on a server before a change — for a change record, a security audit, or a before/after comparison after a firewall rule update. Copying terminal output manually is error-prone.
The solution: nmap has built-in output options. -oN saves normal (readable) output to a file. -oG saves greppable output useful for scripting. -oX saves XML for import into other tools.
rem Save scan results as a readable text file
rem -oN = normal output format
nmap -sV 192.168.1.50 -oN C:\bat\scan-srv-web-01.txt

rem Save as greppable format — useful for parsing results with findstr or scripts
nmap -p 80,443,3389 192.168.1.0/24 --open -oG C:\bat\subnet-scan.txt
Hidden gems
-T controls scan speed and aggression
The -T flag sets the timing template from T0 (paranoid, very slow) to T5 (insane, very fast). The default is T3 (normal). On a local LAN, T4 gives noticeably faster results without reliability issues. On sensitive production systems or slow links, T2 reduces the chance of disrupting services or triggering rate-limiting:
rem T4 = aggressive timing — faster on local networks
nmap -T4 -p- 192.168.1.50

rem T2 = polite timing — slower, less disruptive on production systems
nmap -T2 -p 80,443 192.168.1.50
-Pn skips host discovery when ping is blocked
By default nmap pings the target first to confirm it is alive before scanning ports. If ICMP is blocked by a firewall, nmap marks the host as down and skips the port scan — even if the host is reachable on TCP. -Pn skips the ping step and scans ports directly:
rem Skip ping — scan ports even if the host does not respond to ICMP
rem Useful when Windows Firewall or a network firewall blocks ping
nmap -Pn -p 80,443,3389 192.168.1.50
OS detection with -O
The -O flag attempts to identify the operating system of the target by analyzing TCP/IP stack behavior. It requires elevated privileges and at least one open and one closed port on the target to make an accurate guess. Useful during audits when you need to identify unmanaged devices on the network:
rem Attempt OS detection — requires elevated CMD and Npcap
nmap -O 192.168.1.50
Where this matters
Pre-deployment port audit — before installing a new service, scan the target machine to confirm the required port is not already in use by another process.
Firewall rule verification — after adding or changing a firewall rule, scan from a machine in the relevant network segment to confirm the rule has the expected effect.
Finding exposed RDP or SMB — a subnet scan for ports 3389 or 445 quickly identifies machines with these services exposed, which is a common security audit step in environments where these ports should be restricted.
Inventory of active services — on servers that have been running for years without documentation, a service version scan produces a fast inventory of what is actually listening without needing to log in and check each service manually.
Troubleshooting application connectivity — when an application cannot reach a backend service, scanning the backend from the application server confirms whether the port is open from that specific network path, which isolates whether the problem is in the application or the network.
Tips and limitations
- Always get permission before scanning. Running nmap against machines you do not own or do not have explicit authorization to scan is illegal in many jurisdictions and violates most corporate security policies. This applies even inside your own organization — some environments require a change ticket before running network scans.
- Windows Firewall affects results from the same machine. Scanning localhost or the machine’s own IP from the same machine bypasses the network stack and may show ports as open that are actually blocked from the network. Always scan from a different machine to get an accurate picture of what is reachable over the network.
- nmap does not replace an external port checker for inbound testing. Like
Test-NetConnection, nmap tests connectivity from the machine it runs on. To verify that a port is reachable from the internet, use an external tool. - Antivirus software may flag nmap. Some endpoint protection tools flag nmap as a hacking tool and quarantine it or block its execution. If nmap fails to run after installation, check the AV exclusions or run from an allowlisted path.
Official documentation
- nmap download for Windows — official installer and release notes
- nmap Reference Guide — complete flag and option documentation
Related tools
- Port Checker — verify that a port is reachable from the internet after confirming it is open with nmap from inside the network
- Network Diagnostics Tool — run DNS lookup, ping, and port checks in one place without installing anything
Related guides
- How to check open ports on Windows — built-in alternatives to nmap using netstat and Test-NetConnection
- netstat command in Windows — check local port state and active connections without external tools
- nslookup — Windows DNS troubleshooting — resolve hostnames before scanning to confirm DNS is returning the correct IP for the target
- Common Network Ports Cheat Sheet — quick reference when you need to know what service uses a specific port number