
VMware PowerCLI is a collection of PowerShell modules that lets you manage vSphere infrastructure through the command line. Instead of navigating the vSphere Client manually, you can automate repetitive tasks, pull inventory reports, manage snapshots, and interact with vCenter or ESXi hosts directly from a PowerShell session.
This guide covers the full installation process: installing PowerCLI from the PowerShell Gallery, verifying the module, connecting to vCenter or ESXi, and handling common issues like SSL certificate errors.
VMware.PowerCLI to VCF.PowerCLI with VCF PowerCLI 9.0 in June 2025. The cmdlets, the submodule names and your existing scripts are unchanged, but the package you install from the PowerShell Gallery has a new name. This guide installs VCF.PowerCLI; if you are still on VMware.PowerCLI 13.3 or earlier, the upgrade path is in Step 3.
Prerequisites
- PowerShell 7.4 or later. Broadcom names 7.4 as its minimum recommended version and has Windows PowerShell 5.1 marked for deprecation, so 5.1 still works but is not what to build new automation on
- Network access to the PowerShell Gallery (gallery.powershellgallery.com)
- Access to a vCenter Server or ESXi host to test the connection
Quick answer
If you already know what you are doing, here is the full sequence:
# Install PowerCLI for the current user
Install-Module -Name VCF.PowerCLI -Scope CurrentUser

# Disable CEIP prompt
Set-PowerCLIConfiguration -Scope User -ParticipateInCEIP $false

# Connect to vCenter and be prompted for the credentials
Connect-VIServer -Server vc01.vsphere.local -Credential (Get-Credential)

# List virtual machines
Get-VM

# Disconnect when done
Disconnect-VIServer -Server * -Confirm:$false
Step 1 - Open PowerShell as Administrator
Search for PowerShell in the Start menu, right-click it, and choose Run as Administrator.
-Scope CurrentUser, the module installs into your user profile and does not affect other users on the machine.
Step 2 - Check your PowerShell version
PowerCLI requires PowerShell 5.1 or later. Run the following to check:
$PSVersionTable.PSVersion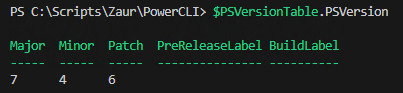
Step 3 - Install the PowerCLI module
PowerCLI is published to the PowerShell Gallery by Broadcom under the name VCF.PowerCLI. On a machine that has never had PowerCLI on it, one command is enough:
Install-Module -Name VCF.PowerCLI -Scope CurrentUserThe -Scope CurrentUser flag installs the module into your user profile directory. This avoids modifying shared module paths on the machine and does not require system-wide administrator rights beyond the initial session elevation.
On a machine that already carries VMware.PowerCLI 13.3 or earlier, do not install on top of it. Broadcom's guidance is to uninstall the old module first and start clean, because several cmdlets moved between submodules and the two packages collide. If you would rather leave the old module in place, two switches get the install through:
# -AllowClobber accepts the cmdlet names the old module already registered
# -SkipPublisherCheck accepts the Broadcom signing certificate in place of the old VMware one
Install-Module -Name VCF.PowerCLI -Scope CurrentUser -AllowClobber -SkipPublisherCheck

# Update a Gallery installation later with
Update-Module -Name VCF.PowerCLI
Without -AllowClobber the install stops with PackageManagement\Install-Package : The following commands are already available on this system. Without -SkipPublisherCheck it can stop on a certificate error instead, because the module is now signed by Broadcom rather than VMware. Update-Module only works if the module came from the Gallery: an offline installation has to be replaced by another offline installation.
Step 4 - Verify the installation
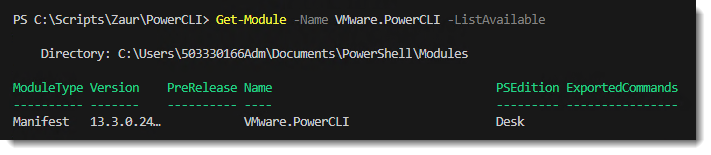
Confirm that the module is available:
Get-Module -Name VCF.PowerCLI -ListAvailableThe screenshot below was captured on a machine that still had VMware.PowerCLI installed. The layout is identical for VCF.PowerCLI; only the name in the Name column differs.
The submodules kept their original names through the rename, so this wildcard finds them whichever package you installed:
Get-Module -ListAvailable | Where-Object { $_.Name -like "VMware*" }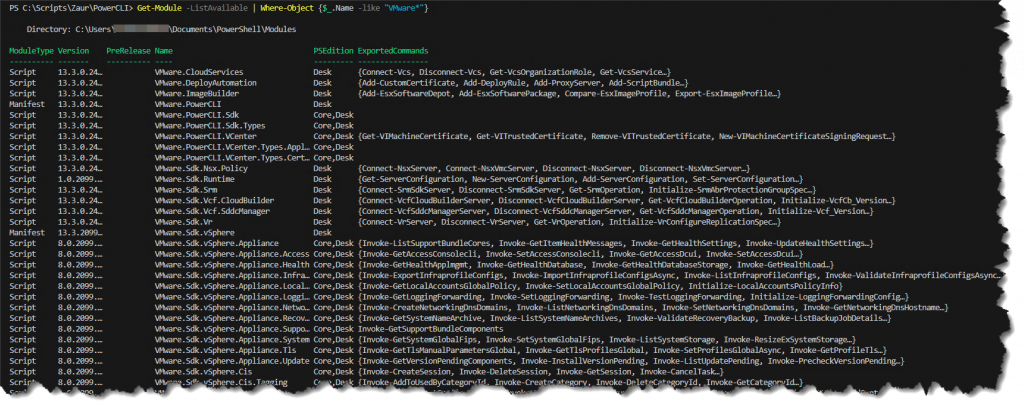
PowerCLI installs as a set of submodules such as VMware.VimAutomation.Core, VMware.VimAutomation.Vds, and others. Each submodule covers a different area of vSphere functionality.
Step 5 - Import the module
Load PowerCLI into the current session:
Import-Module VCF.PowerCLIIn most cases, PowerShell 5.1 and 7.x load installed modules automatically when you call a cmdlet from them. Explicit import is useful when you want to ensure the module is loaded before running a script.
Step 6 - Disable the CEIP prompt (optional)
When you first use PowerCLI, it may display a prompt asking whether you want to join VMware's Customer Experience Improvement Program.

To dismiss it and opt out:
Set-PowerCLIConfiguration -Scope User -ParticipateInCEIP $falseStep 7 - Connect to vCenter or ESXi
Use Connect-VIServer to establish a session. If you omit the credentials, PowerShell will prompt for them interactively:
# Connect with interactive credential prompt (recommended)
Connect-VIServer -Server vc01.vsphere.local

# Connect with explicit credentials (useful in scripts - see warning below)
Connect-VIServer -Server vc01.vsphere.local -User administrator@vsphere.local -Password YourPasswordGet-Credential for interactive prompts, or a secrets manager such as a PowerShell SecretStore vault for automated workflows. The -Password parameter shown above is for reference only.

Step 8 - Handle SSL certificate errors
If your vCenter uses a self-signed certificate, the connection will fail with:
Connect-VIServer: The SSL connection could not be established, see inner exception.PowerCLI validates SSL certificates by default. To bypass this for the current session only:
# Suppress certificate validation for this session only
Set-PowerCLIConfiguration -Scope Session -InvalidCertificateAction Ignore
To make the setting persistent for your user account:
# Persist the setting for the current user account
Set-PowerCLIConfiguration -Scope User -InvalidCertificateAction IgnoreAfter adjusting the certificate setting, reconnect:
Connect-VIServer -Server vc01.vsphere.local -User administrator@vsphere.local -Password YourPasswordStep 9 - Verify the connection
Once connected, run a basic command to confirm the session is working:
# List all virtual machines visible to the connected vCenter or ESXi host
Get-VM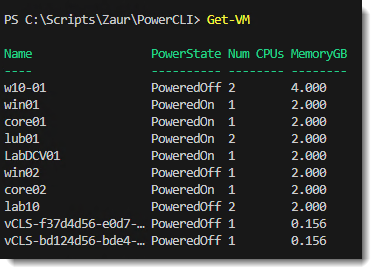
Get-VM returns a list of virtual machines, the module is installed correctly and the session is active.
Step 10 - Disconnect when done
Close the session after you finish. This releases the connection on the server side and is good practice in scripts, particularly when connecting to multiple hosts.
# Disconnect from all connected vSphere servers without a confirmation prompt
Disconnect-VIServer -Server * -Confirm:$false

# Disconnect from a specific server
Disconnect-VIServer -Server vc01.vsphere.local -Confirm:$false
Official reference
VMware PowerCLI - Broadcom Developer Portal
Related guides
- Get-VM inventory reporting in PowerCLI: the first useful thing to build once PowerCLI is installed.
- esxcli syntax, formatters and remote execution: running host commands over the same connection.
- How to manage vSphere snapshots with PowerCLI
- Getting started with PowerCLI automation scripts
- VMware PowerCLI command reference
- VMware PowerCLI Cheat Sheet - a one-page reference for the cmdlets in this guide, including the VCF.PowerCLI module change.
- Get-VMGuestDisk: guest disk free space: one of the first reporting cmdlets worth running once the module is in place.
- Invoke-VMScript: run a script inside a VM without guest networking: what to do first once PowerCLI is installed and you need to reach inside a guest OS.
- How to upgrade PowerShell 7 on Windows 10 and 11: the
winget, MSI and MSIX routes to a current pwsh before installing PowerCLI.
Related tools
- PowerCLI Command Builder - assemble the PowerCLI one-liners used in this workflow
Five cheat sheets, one PDF
Subnet masks, PowerShell, Linux commands, HTTP status codes and the ESXi command line - one page each, free to keep. Leave an address and it arrives in a minute.