
Hey there! 👋
So recently, I needed to start managing a vSphere environment more efficiently, and rather than clicking my way through the vSphere Client, I figured: why not automate things a bit with PowerShell? That’s where VMware PowerCLI comes into play — a super handy set of modules that lets you interact with vSphere using PowerShell commands.
If you’re just getting into this, don’t worry — installing PowerCLI is way easier than it used to be. No more separate downloads from VMware’s site or wrestling with .exe installers. Now, it’s all done straight from PowerShell itself. Here’s how I did it, step by step.
🔧 Step 1: Open PowerShell as Administrator
First things first — launch PowerShell as Administrator. Just search for “PowerShell” in your Start menu, right-click it, and choose “Run as Administrator”.
Why admin? Because we’re going to install a module from the PowerShell Gallery, and that requires elevated permissions.
🌍 Step 2: Check Your PowerShell Version (Optional but Helpful)
PowerCLI requires at least PowerShell 5.1 or PowerShell 7.x (Core).
You can check your version by typing:
$PSVersionTable.PSVersion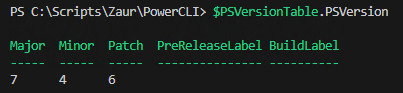
If you’re running an old version, consider updating. Windows 10 and 11 usually come with 5.1, and you can always install PowerShell 7 side-by-side.
📦 Step 3: Install the PowerCLI Module
Here’s the magic command:
Install-Module -Name VMware.PowerCLI -Scope CurrentUserI used -Scope CurrentUser so I didn’t need system-wide permissions. This also avoids messing with shared module paths if you’re on a work machine.
If this is your first time installing something from the PowerShell Gallery, you might see a prompt like:
“You are installing the modules from an untrusted repository…”
Just type Y or A to continue. PowerCLI is safe and officially published by VMware.
✅ Double-check: Is PowerCLI Installed?
To make sure the module is installed and available, run:
Get-Module -Name VMware.PowerCLI -ListAvailable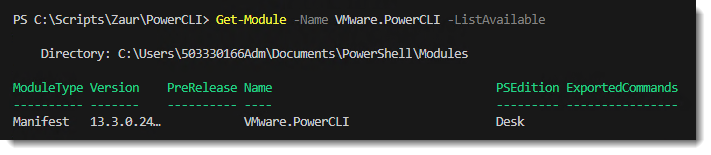
If you see output with the module name and version — you’re good to go!
You can also check all VMware-related modules like this:
Get-Module -ListAvailable | Where-Object {$_.Name -like "VMware*"}
That’s a nice way to confirm which parts of PowerCLI are available (since it installs several submodules like VMware.VimAutomation.Core, VMware.VimAutomation.Vds, etc.).
✅ Step 4: Import the Module
After installation, bring it into your session with:
Import-Module VMware.PowerCLIOr just restart PowerShell — it’ll load automatically the next time you need it.
🛡️ Step 5: Disable the CEIP Prompt (Optional)
PowerCLI might ask if you want to join VMware’s Customer Experience Improvement Program.

You can either opt in or not. I like to keep things quiet, so I ran:
Set-PowerCLIConfiguration -Scope User -ParticipateInCEIP $falseTotally optional, but nice to know.
🔌 Step 6: Connect to vCenter or ESXi
Now you’re ready to go! Connect to your vCenter or ESXi host like this:
Connect-VIServer -Server your-vcenter-name-or-ip

# in my case I used this command along with username and password:
Connect-VIServer -Server vc01.vsphere.local -User administrator@vsphere.local -Password MyPassword1!
You’ll be prompted for credentials, or you can add -User and -Password if needed (though I recommend avoiding hardcoding passwords if you can help it).
🧪 Quick Test
Try listing all your VMs:
Get-VM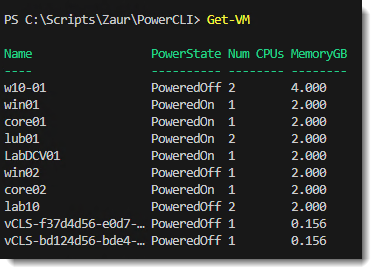
Boom! You’re now officially scripting against vSphere. 😎
❗ Bonus Tip: Got an SSL Error?
If your vCenter is using a self-signed certificate, you might run into this:
Connect-VIServer: The SSL connection could not be established, see inner exception.No need to panic — PowerCLI is just being cautious.
🩹 Quick Fix (Session Only):
Set-PowerCLIConfiguration -Scope Session -InvalidCertificateAction IgnoreThen reconnect:
Connect-VIServer -Server your-vcenter-name-or-ip

# in my case I used this command along with username and password:
Connect-VIServer -Server vc01.vsphere.local -User administrator@vsphere.local -Password MyPassword1!
🔒 Permanent Fix (For Trusted Lab Environments):
If you’re in a safe lab and don’t want to repeat that every time, set it once globally:
Set-PowerCLIConfiguration -Scope AllUsers -InvalidCertificateAction Ignore
🛑 Warning: Only do this if you trust the environment. In production, always use valid, trusted certificates!
🔄 Step 7: Disconnect When You’re Done
Once you’re finished running your commands or scripts, it’s a good habit to disconnect from the vCenter or ESXi host. This helps free up server resources and keeps things tidy.
To disconnect:
Disconnect-VIServer -Server * -Confirm:$falseThis will disconnect you from all connected vSphere servers without prompting for confirmation.
You can also disconnect from a specific server:
Disconnect-VIServer -Server your-vcenter-name-or-ip -Confirm:$falseDone and dusted! ✔️
💡 Final Thoughts
Honestly, installing PowerCLI has never been easier. If you’re planning to automate tasks, pull reports, manage snapshots, or build dashboards, you’re going to love how much time PowerShell saves.
Let me know if you run into any issues or want help with your first script — I’m still learning too, but happy to share what I’ve figured out.
Happy scripting! 🧑💻✨